How to Harden Your Home Against Wildfire: A Complete Guide
November 14, 2025 · 18 min read
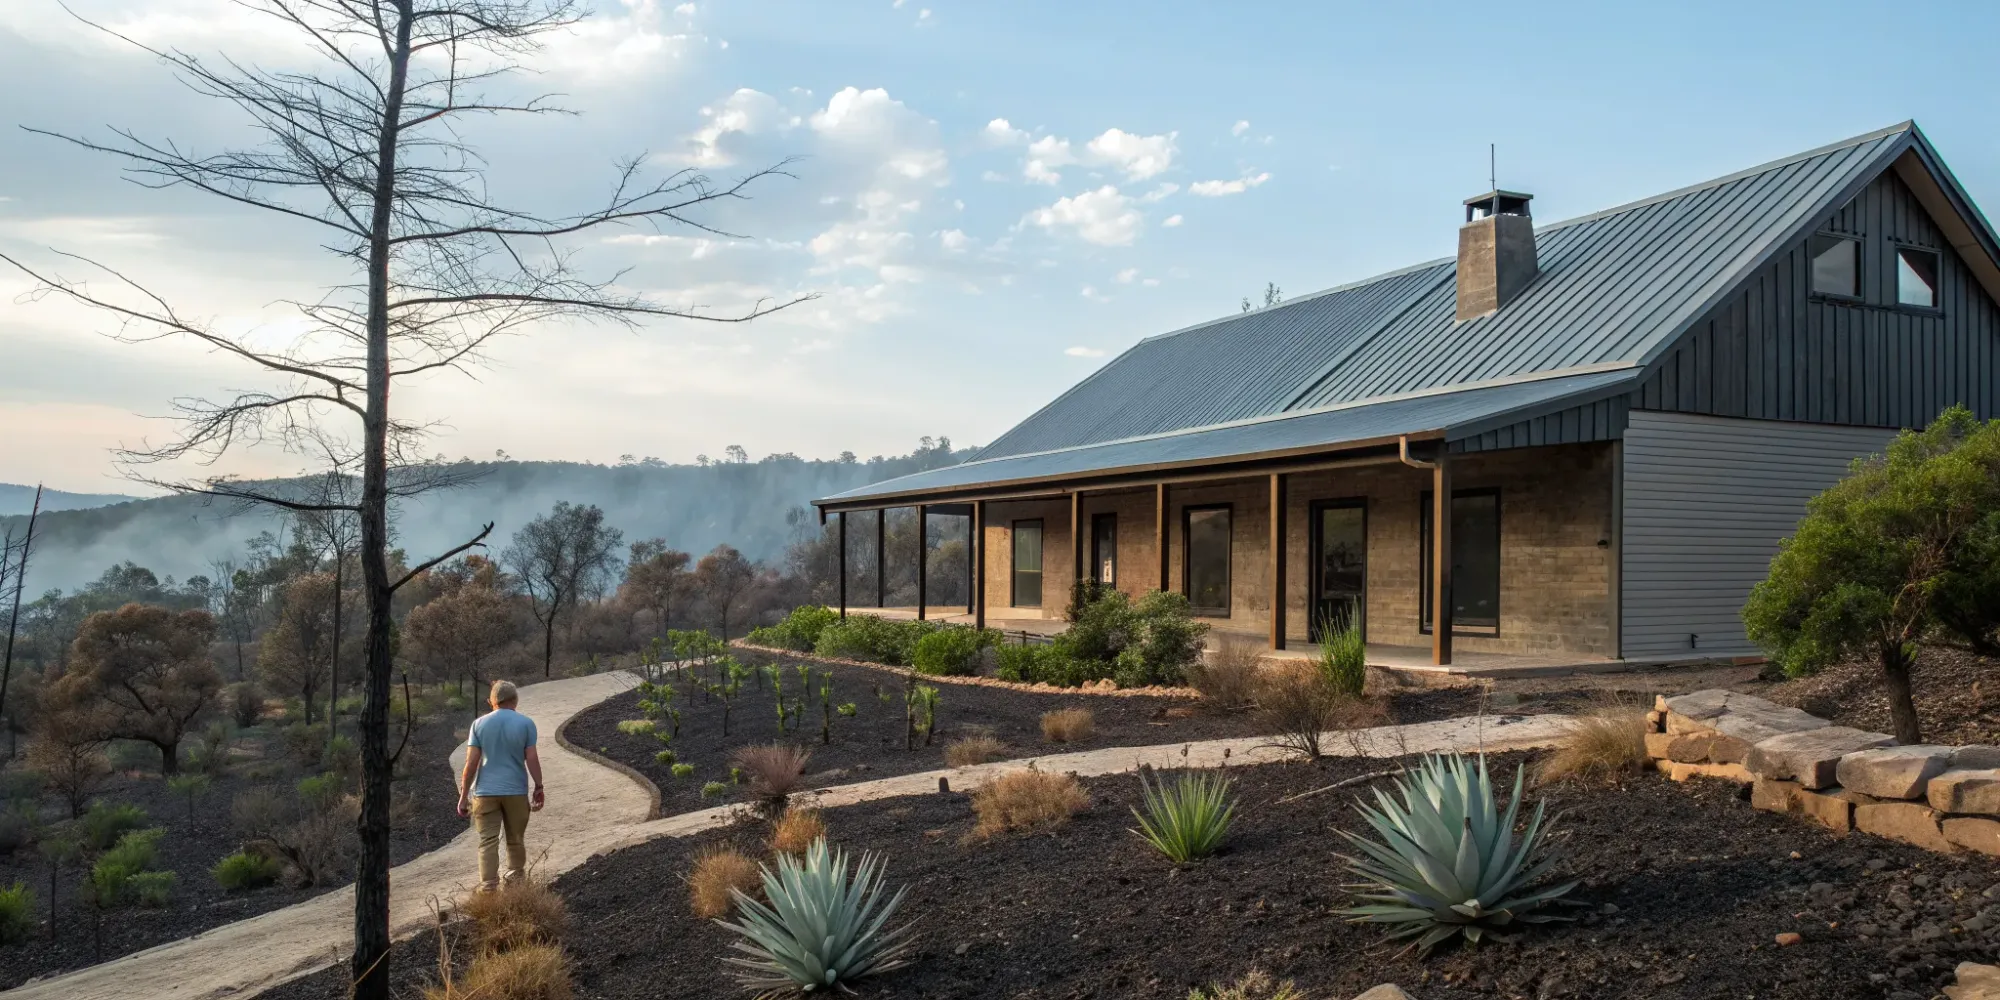
When you think of a wildfire, you probably picture a huge wall of flames. But the truth is, most homes are lost to something much smaller: embers. These tiny, burning particles can travel a mile or more on the wind, landing on your roof or getting sucked into vents. This is why understanding how to harden your home against wildfire is so critical. It’s not just about stopping a massive fire front; it’s about sealing the small weak points that embers exploit. This guide breaks down the real threats and gives you a clear, actionable plan to protect your property from the ground up.
Key Takeaways
- Seal your home against embers: Most homes ignite from tiny, wind-blown embers, not a wall of flames. Prioritize sealing the small entry points by covering vents with 1/8-inch metal mesh, caulking gaps around pipes, and upgrading to multi-pane windows.
- Make your yard your first line of defense: Create a buffer zone by removing all flammable materials, including bark mulch and dead plants, within five feet of your foundation. This defensible space is critical for slowing a fire and giving firefighters a safe area to work.
- Choose materials that won’t burn: Your home's exterior is its armor. Use Class A fire-rated materials for your roof (like metal or tile) and noncombustible siding (like fiber cement or stucco) to build a structure that can resist ignition from intense heat.
What is Home Hardening (and Why Does It Matter)?
So, what exactly is home hardening? Think of it as a proactive way to make your home more resistant to wildfires. It involves using fire-resistant building materials and making smart design choices to protect your property from the two biggest threats: direct flames and airborne embers. When you harden your home, you’re not just protecting your investment—you’re safeguarding your family and contributing to the safety of your entire community.
The goal is to reduce the chances of your home igniting in the first place. Embers can find their way into small openings, and flammable materials near your house can act as a welcome mat for fire. By addressing these vulnerabilities, you create a structure that is far more likely to survive a wildfire, even without firefighter intervention. This process is one of the most effective steps you can take to gain peace of mind when living in a high-risk area. It’s about building a home that can stand its ground.
Understand the Three Zones of Wildfire Risk
A core principle of home hardening is creating "defensible space" around your house. This is a buffer you create between your home and the surrounding vegetation. Experts break this area into three distinct zones, each with its own set of rules.
The first and most critical is Zone 1, which covers the area from 0 to 5 feet from your foundation. This is a non-combustible zone. Remove anything that can burn, including bark mulch, dead plants, and woodpiles. The second is Zone 2, extending from 5 to 30 feet out. This area should be "lean, clean, and green," meaning you should have well-maintained, irrigated plants and remove any dead vegetation. Finally, Zone 3 stretches from 30 to 100 feet, where you should thin out trees and shrubs to reduce fuel for a fire. Properly managing these three zones of defensible space is your first line of defense.
Why Embers Are the Real Threat
When you picture a wildfire, you probably imagine a massive wall of flames. While that’s certainly a danger, it’s not what destroys most homes. The real threat comes from embers—small, burning pieces of debris that can be carried by the wind for a mile or more ahead of the fire itself. These embers are the primary reason homes ignite during a wildfire.
This is one of the most important wildfire myths to understand. An ember can land in your gutter, get sucked into a vent, or settle under your deck, igniting a fire long before the main flames arrive. That’s why so much of home hardening focuses on sealing small entry points and removing flammable materials from the immediate vicinity of your house. Protecting your home isn’t just about stopping a large fire; it’s about preventing a small ember from starting one.
Choose Fire-Resistant Roofing and Siding
The Best Roofing: Metal and Tile
Think of your roof as your home’s first line of defense. It’s the largest, most exposed surface, making it incredibly vulnerable to falling embers. That’s why selecting a noncombustible material is one of the most important decisions you can make. Metal, clay tile, and concrete tile are all excellent choices because they simply don’t burn. When you’re shopping, look for materials with a Class A fire rating, which is the highest level of fire resistance a roofing material can achieve. This rating ensures your roof can withstand severe fire exposure, giving your home—and everyone in it—a critical layer of protection when it matters most.
The Best Siding: Stucco and Fiber Cement
Your home’s siding is its protective skin. Just like with your roof, you want a material that won’t ignite when embers land on it or when it's exposed to intense heat from a nearby fire. Stucco, fiber cement, and brick are top-tier options for fire-prone areas. These materials are noncombustible and do a fantastic job of resisting heat transfer. Fiber cement, in particular, is a popular choice because it can be designed to look like traditional wood siding without carrying the same fire risk. By choosing a fire-resistant siding, you’re creating a strong barrier that helps keep flames from ever reaching the interior structure of your house.
Materials to Avoid in High-Risk Areas
In a wildfire-prone region, some building materials are simply too risky to use. Wood shake or shingle roofs are at the top of the list to avoid. They ignite very easily and can turn your roof into a massive fuel source for the fire. For siding, untreated wood and vinyl are poor choices. Vinyl siding can melt and fall away when exposed to high heat, leaving the structure underneath vulnerable to ignition. While it’s possible to treat some wood products with fire retardants, it’s far safer to build with materials that are inherently noncombustible from the start. Making smart choices here is fundamental to creating a truly resilient home.
Create Your Defensible Space
One of the most effective ways to protect your home from a wildfire is to create defensible space. Think of this as a buffer zone you create between your house and the surrounding grass, trees, and wildland. This space is designed to slow or even stop the spread of wildfire and protect your home from direct flames and intense heat. It also gives firefighters a safer area to defend your property if a fire approaches. Creating this space isn't about clearing your entire yard; it's about strategic landscaping that removes the fuel a fire needs to travel. By managing the vegetation and materials around your home, you can dramatically reduce its risk. The National Fire Protection Association (NFPA) provides excellent guidelines for preparing homes for wildfire that break down your property into different zones of defense, each with its own set of rules. This zoned approach helps you prioritize your efforts, starting with the area immediately surrounding your home and working your way out. Taking the time to establish and maintain this space is a proactive step that puts you in control and gives your home a fighting chance against embers and flames.
Zone 1: The First 30 Feet From Your Home
This is the most critical area, acting as your home's last line of defense. In this zone, your goal is to eliminate anything that can easily burn. Keep this area completely free of dead plants, dry leaves, pine needles, and woodpiles. Instead of flammable mulch, use non-combustible materials like gravel, pavers, or concrete for walkways and patios next to the house. Prune any tree branches that hang over your roof, and make sure there are no flammable items stored under your deck or porch. This immediate zone should be a clean, ember-resistant space that won't allow fire to get a foothold right next to your walls.
Zone 2: Extending to 100 Feet
This intermediate zone is all about keeping things "lean, clean, and green." The goal here is to interrupt the fire's path by reducing the amount of available fuel. You don't need to remove all vegetation, but you should thin it out. Create space between trees and shrubs, removing any "ladder fuels"—smaller shrubs and low branches that could carry a ground fire up into the tree canopy. Keep your lawn mowed short and well-watered. Regularly rake up fallen leaves, twigs, and pinecones. By maintaining this area, you can effectively slow a fire down and lower its intensity before it ever reaches your home.
Smart, Fire-Resistant Landscaping
Your landscaping choices play a huge role in your home's defense. To create an effective fuel break, space shrubs at least 15 feet apart and remove the lower branches from mature trees up to a height of 15 feet. This simple step prevents fire from climbing into the treetops and spreading from crown to crown. When choosing plants, opt for high-moisture, low-resin varieties that are naturally more fire-resistant. You can also protect your home by using non-combustible materials for fences, gates, and patio covers. A metal fence is a much safer choice than a wooden one, especially when it connects directly to your house.
Secure Your Home’s Weakest Points from Embers
Think of embers as tiny, wind-driven torches searching for a way into your home. During a wildfire, millions of them can travel a mile or more ahead of the actual fire front, landing on your roof, in your yard, and against your walls. It's a common misconception that homes are lost only to direct contact with flames. In reality, most homes ignite because of these small, glowing embers. Even if your home is built with fire-resistant siding and roofing, embers can find their way inside through surprisingly small openings, starting a fire from within. This is why securing your home’s most vulnerable points is one of the most important steps you can take.
Your windows, vents, and any small gaps in your home’s exterior are the primary entry points. Radiant heat from a nearby fire can cause windows to break, while vents offer a direct path into your attic or foundation. Sealing these weak spots creates a protective shell around your living space, dramatically improving your home’s chances of survival. It’s a detailed process, but focusing on these key areas gives you a powerful defense against the biggest threat during a wildfire.
Install Fire-Rated Windows and Doors
Your windows and glass doors are particularly vulnerable to wildfire. The intense radiant heat from a nearby fire can shatter standard single-pane glass, creating an easy entry point for flames and embers. Upgrading to multi-pane windows with tempered glass provides a much stronger barrier. These windows are designed to withstand higher temperatures for longer periods. For an even higher level of protection, you can install fire-rated shutters that can be closed when a fire threatens the area. This investment not only hardens your home but also adds to its overall energy efficiency.
Cover Vents with Ember-Resistant Screens
Vents in your attic, foundation, and roof are necessary for airflow, but they can also act as open invitations for embers. To fix this, you’ll want to cover all vent openings with fine metal mesh screens. The guidance from fire safety experts recommends a mesh with openings no larger than 1/8-inch to effectively block embers. It’s critical to use metal screening, as plastic or fiberglass mesh can melt from the heat of a fire, rendering it useless. This is a relatively simple and inexpensive fix that closes off some of the most common pathways for embers to enter your home.
Seal Gaps and Small Openings
Take a walk around your home and look for any small gaps where an ember could potentially slip through. Pay close attention to the areas under eaves, between your foundation and siding, and where pipes or utilities enter the house. Use weather-stripping, caulk, and other sealants to close off these openings. If your foundation is exposed, enclosing it can prevent embers from getting trapped underneath your home where they can ignite flooring and support beams. Sealing your home’s exterior shell is a meticulous but essential step in creating a truly ember-resistant structure.
Design Fire-Safe Decks and Outdoor Structures
Your deck, patio, and fences are extensions of your home, but they can also act as a bridge for wildfire. Because they’re often attached directly to the house, flammable materials can give embers an easy path to ignite your home. Hardening these outdoor structures is just as important as securing your roof and walls. By focusing on smart material choices, strategic placement of furniture, and simple maintenance, you can turn these potential liabilities into fire-resistant features. Let’s walk through the key steps to creating a safer outdoor space.
Build with Noncombustible Decking Materials
A classic wooden deck is a beautiful feature, but in a wildfire-prone area, it’s essentially kindling attached to your house. Embers can easily get lodged in cracks and ignite the wood. The best approach is to build with materials that won’t burn. When planning a new deck or replacing an old one, look for composite decking with a Class A fire rating. Other excellent, noncombustible options include stone pavers, brick, or concrete patios, which create a surface where embers burn out harmlessly. Making the right choice here is a foundational step in creating a fire-adapted home and can significantly reduce your risk.
Arrange Furniture and Storage Safely
What you place on and around your deck matters, too. Wicker furniture, flammable cushions, and wooden planters can all catch fire from embers. Opt for outdoor furniture made from metal or other noncombustible materials. The same logic applies to fences. A wooden fence can act like a wick, leading fire straight to your house. To prevent this, you should "interrupt that path with a minimum 5-foot section of noncombustible fence" where it connects to your home. Materials like metal or masonry are ideal for this buffer. Also, be sure to store firewood piles and propane tanks at least 30 feet away from all structures.
Keep the Area Under Your Deck Clear
The space underneath your deck is a magnet for dry leaves, pine needles, and other wind-blown debris. This accumulation creates a perfect fuel bed for embers that get swept underneath. As CAL FIRE advises, you must "keep the area under your deck completely clear of anything that can burn." Make it a regular habit to sweep or rake out this space, especially during fire season. For a more permanent solution, consider enclosing the underside of your deck with a fine wire mesh (1/8-inch screen). This prevents debris from collecting while still allowing for airflow, effectively removing a key ignition point.
Common Home Hardening Mistakes to Avoid
When you’re focused on big projects like replacing a roof or installing new windows, it’s easy to let the smaller details slip. Unfortunately, in a wildfire, it’s often those small details that make the biggest difference. Many homeowners make the same preventable mistakes when hardening their homes, simply because they don’t know what to look for. The good news is that once you’re aware of these common missteps, you can easily correct them.
The most frequent errors fall into three main categories: ignoring the tiny gaps where embers can sneak in, using flammable materials too close to the house, and letting yard maintenance slide. Think of it this way: you wouldn't leave your front door wide open during a storm, and you shouldn't leave your home vulnerable to embers, either. By addressing these weak points, you create multiple layers of protection that work together to keep your home standing. Let’s walk through what to watch out for so you can feel confident that your home is truly prepared.
Overlooking Small Entry Points
It’s a common misconception that a wall of flames is the biggest threat to your home. In reality, the real danger often comes from tiny, wind-blown embers that can travel a mile or more ahead of the fire. These embers are relentless, searching for any small opening to get inside and ignite your house from within. Vents—for your attic, foundation, or dryer—are major culprits, as they create direct pathways into your home. To fix this, you can harden your home by covering all vent openings with metal screens. The mesh should have openings no smaller than 1/8-inch and no larger than 1/4-inch to block embers while still allowing for airflow.
Using Flammable Materials Near the House
The materials you choose for your home and the structures connected to it can either help defend it or act as fuel. For example, a wood-shingle roof or siding can easily catch fire from embers, putting your entire home at risk. The same goes for fences. A flammable wooden fence attached to your house can act like a wick, leading fire directly to your exterior walls. When building or replacing a fence, consider using ignition-resistant or non-combustible materials like metal, stone, or masonry, especially for the section closest to your home. This simple choice can stop a fire in its tracks before it ever reaches your structure.
Neglecting Yard Maintenance
Your yard is the first line of defense, and keeping it clean is one of the most effective home hardening tasks you can do. A yard cluttered with dry leaves, pine needles, and dead vegetation provides the perfect fuel for embers to land and ignite. This is especially true for the area right next to your house. Gutters are notorious for collecting flammable debris, so it’s critical to keep them clean throughout the year, not just in the fall. Regularly raking leaves, clearing away dead plants, and trimming back overgrown shrubs removes fuel and strengthens your defensible space, giving your home a much better chance of survival.
Keep Your Home Fire-Resistant with Ongoing Maintenance
Building a fire-resistant home is a huge accomplishment, but the work doesn’t stop once the construction is complete. Think of home hardening as an ongoing practice, not a one-time project. Over time, weather and daily life can create new vulnerabilities. Leaves and pine needles pile up in your gutters, screens can get torn, and small gaps can appear in your home’s exterior. These seemingly minor issues can become serious entry points for embers during a wildfire.
Consistent upkeep is what keeps your home’s defenses strong, season after season. By creating a simple maintenance routine, you can ensure that the fire-resistant features you invested in continue to protect your family and property. It’s about staying proactive and catching small problems before they become big risks. A little bit of regular effort goes a long way in maintaining your peace of mind. The following checklists and schedules will help you stay on top of the essential tasks that keep your home prepared.
Your Seasonal Cleanup Checklist
The changing seasons are a perfect reminder to clear away flammable debris that can accumulate around your home. Before fire season begins, walk through your property and tackle this simple checklist. Start by clearing leaves, pine needles, and twigs from your roof and gutters. This is one of the most important steps you can take, as embers can easily ignite this dry material. Next, sweep away debris from decks, patios, and the area immediately surrounding your foundation. Don’t forget to look under decks and in corners where flammable materials can get trapped by the wind. Making this a regular part of your yard work will significantly reduce your home's fire risk.
A Schedule for Regular Inspections
Setting a schedule for inspections helps you spot wear and tear before it becomes a problem. A good plan is to check your home’s exterior twice a year—once in the spring and again in the fall. During your inspection, look for any damage to your siding, roofing, and windows. Check that your chimney has a spark arrester screen with openings no larger than 1/2 inch to stop sparks from escaping. This is also a great time to ensure all your vent screens are intact and free of holes. Keeping up with this simple routine is a key part of preparing your home for wildfire and ensuring its defenses are always ready.
How to Maintain Vents, Gutters, and Screens
Vents, gutters, and screens are critical points to maintain because they can offer embers a direct path into your home. Make sure all vents—including those for the attic, foundation, and dryer—are covered with 1/8-inch metal mesh screens to block embers. Check these screens regularly for any rips or holes and replace them immediately if you find damage. When cleaning your gutters, also check that they are securely attached to the house and don’t have any gaps that could trap debris. Finally, inspect your window screens for tears. Taking the time to prepare and protect your home by maintaining these small but crucial details makes a massive difference in its overall resilience.
Align Your Plan with Building Codes and Insurance
Making your home more resilient to wildfire involves more than just choosing the right materials and clearing your yard. To get the full benefit of your hard work, your home hardening plan needs to align with local building codes and the expectations of your insurance provider. These regulations aren't just bureaucratic hurdles; they are safety blueprints designed to protect your property and community. Ensuring your project is compliant from the start can save you from costly revisions, help you secure insurance coverage, and give you confidence that your home is truly prepared.
Know Your Local Fire Safety Codes
Building codes for wildfire-prone areas can be incredibly specific, and they vary significantly from one county to the next. As experts from GovTech note, "home hardening strategies aren't one-size-fits-all." Your local codes will dictate requirements for everything from roofing materials and siding to the type of vents you can install. Before you begin any project, your first step should be to consult your local building department. They can provide the current regulations, such as the International Wildland-Urban Interface Code (IWUIC), which many communities have adopted. Understanding these rules ensures your project will pass inspection and truly meets the safety standards for your specific location.
How a Hardened Home Can Help with Insurance
In many high-risk areas, securing and keeping homeowner's insurance has become a major challenge. It's a common myth that if a wildfire destroys your home, insurance will simply cover a rebuild, no questions asked. The reality is that insurers are increasingly non-renewing policies for homes they deem too risky. By hardening your home, you are actively reducing that risk. A home with a fire-resistant roof, covered vents, and good defensible space is a much better bet for an insurance company. Be sure to document every upgrade you make with photos and receipts. This creates a clear record you can share with your agent to demonstrate that your property is a lower risk, which can help you maintain your coverage or even find a more affordable policy.
Work with an Expert to Ensure Compliance
Trying to interpret dense building codes and insurance policies on your own can be overwhelming. For example, FEMA’s guidelines recommend at least a "one-hour wall assembly fire resistance rating" for homes in wildfire zones—a technical detail that’s easy to miss if you don't know what to look for. This is where an expert can be invaluable. Working with an architect, contractor, or a specialized service that understands wildfire resilience can help you translate complex requirements into an actionable plan. A professional plan review before construction begins ensures your design is compliant, insurable, and genuinely safe, preventing expensive mistakes and giving you peace of mind.
Related Articles
- Building in a Wildfire Area? Read This First
- The Ultimate Guide to Building a Home in a Wildfire Area
- How to Fireproof Your Home from Wildfires: A Guide
Frequently Asked Questions
I have an existing home. Where's the best place to start with home hardening? Feeling overwhelmed is completely normal, but you don’t have to do everything at once. The best place to start is with the simple, high-impact tasks. Begin by thoroughly cleaning your gutters and the first five feet around your home’s foundation, removing all flammable debris like leaves and pine needles. After that, a great next step is to cover all your vents with 1/8-inch metal mesh. These maintenance and low-cost projects make a huge difference in preventing embers from finding a place to ignite.
Is home hardening an all-or-nothing project? Not at all. Think of it as a series of layers you add to protect your home. Every single improvement you make contributes to its overall resilience. You don't need to replace your roof and all your windows tomorrow to be safer. Start with what you can manage, whether that's a weekend of dedicated yard cleanup or a project to seal gaps around your home's exterior. Each step reduces your risk and is a positive move toward creating a more fire-resistant property.
What's the difference between "defensible space" and "home hardening"? It's helpful to think of them as two parts of the same defense strategy. Home hardening focuses on the house itself—its structure and materials. This includes things like using fire-resistant roofing, installing multi-pane windows, and covering vents. Defensible space is about managing the area around your house. It involves creating a buffer zone by clearing vegetation and removing fuel sources to slow a fire's approach. You need both to give your home the best possible chance of survival.
My home already has a wooden deck. Do I have to tear it down? Not necessarily. While noncombustible materials are always the safest choice, you can take important steps to make an existing wooden deck more fire-resistant. The most critical action is to keep the area underneath it completely clear of leaves, weeds, and anything flammable. You can also enclose the underside with fine metal mesh to prevent debris from collecting. Also, be sure to create a noncombustible zone on top of the deck where it meets the house, using materials like stone pavers under your grill or near the doorway.
How do I know if my home hardening efforts will actually help with my insurance? The key is to be proactive and keep excellent records. Document every upgrade you make with before-and-after photos, receipts for materials, and invoices from contractors. Once you have a solid record of your improvements, schedule a conversation with your insurance agent. Show them the steps you’ve taken to reduce your property's risk. This demonstrates that you are a responsible homeowner and can be very helpful in maintaining your coverage or even finding a better policy.